Luke had been in to see me a few times, thinking about getting a new bike to motivate him back into riding. Something nice, something that would rekindle the flame.
We’d discussed him getting a Colnago a few times; maybe a C60. But, that was already the C64 and then the C68 was released. Finally, one day, he was like, “OK, let’s just do it!”
The Bike
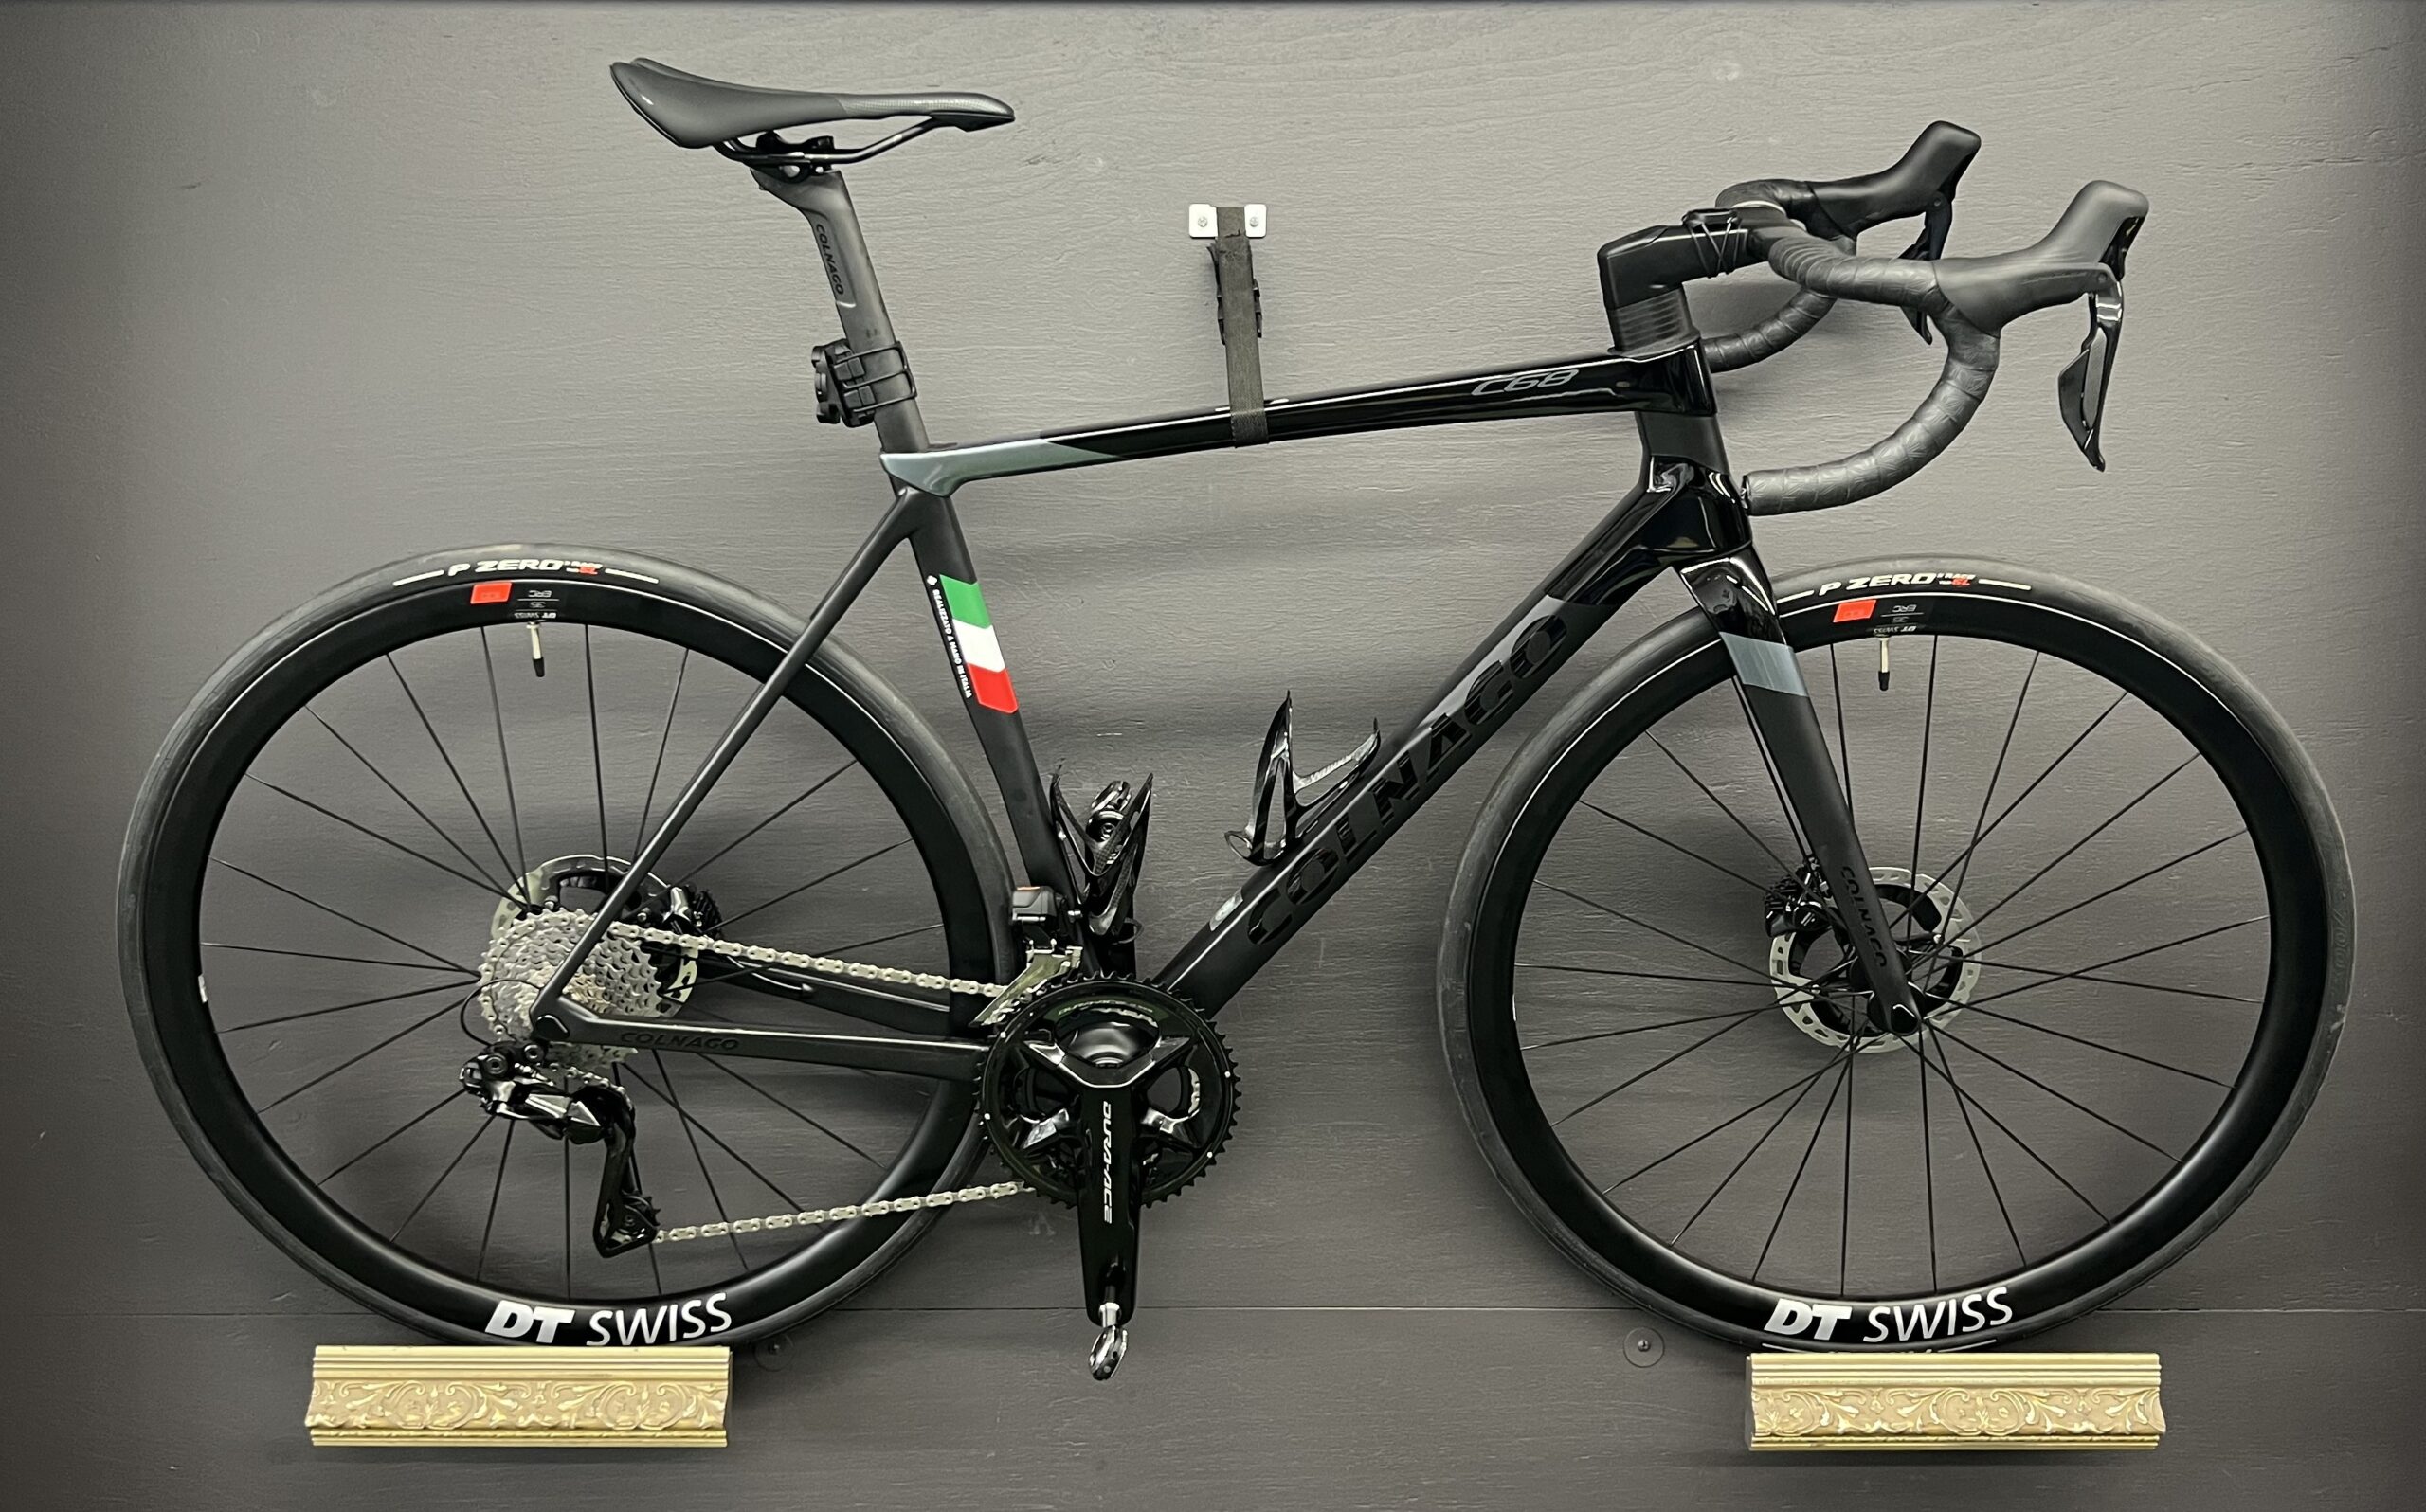
So, we placed an order for a C68 HRBK frame with my favorite purveyor of fine Colnago racing machines. Fortuitously, there was one in his size in the next shipment. That was still a few months away, but enough time to think about all the other critical bits, like a groupset, wheels, and so on.
We decided to go for the Colnago CC.01 integrated handlebar and stem, Shimano 12 Speed Dura Ace Di2 and a pair of DT Swiss ERC 1100 35mm wheels with 28mm Pirelli P-Zero Race SL tyres.
His dream bike!
The wheels and groupset were in stock and arrived almost immediately. The frame arrived fashionably late, in a very Colnago fashion. The integrated handlebar arrived a little while after that.
As soon as the wheels arrived, I got the tyres and tubes on and the rotors and cassette; so we could have a bit of a look at them. I’ve sold quite a few of these DT Swiss wheels and I really like them. I like the look of them and just they way that they’re made. And they roll really well, really smooth. They also come with very excellent wheel bags, some of the best around. Campagnolo wheels still come with wheel bags and sometimes Fulcrum, but ENVE don’t, sadly.
Later, we got the frame and we had an unveiling. A great opportunity for us all to bask in the magnificence of the thing. And then the real fun started.
The Build
I love how manufacturers like to mix things up for us between models. The C60 and C64 both had BSA threaded T47 bottom bracket (BB) cups in the frame from the factory that I could just fit a Campagnolo or Dura-Ace BB into. Maybe that was because there were no T47 bottom brackets around at the time. Anyway, the C68 does not come with those cups fitted.
No big deal, we’ll just order a T47 bottom bracket.
There are now rather a lot of T47 BBs to choose from, suggesting there are more than a few frames using T47. Of course they’re not all the same and neither are the bottom brackets. So, several BBs later we have one that fits. Well, I think it fits, but I can’t tell because it seems like every manufacturer of a T47 BB has decided that they need to have their own spline pattern and therefore, their own specific tool.
On the upside, I will have a nice collection of T47 BB tools by the time I’m finished!
Meanwhile, I got the Di2 battery into the seatpost and ran the cabling through the frame to the derailleurs and fitted those. I got the bottom bracket in and the cranks and pedals on and couldn’t resist the temptation to pop the back wheel in. Yep, this will look great!
After that it was getting the fork in and the handlebar on. Then Luke could come and sit on it on the Tacx trainer and work out where we wanted the handlebars and hoods. Then I could cut the steerer and we’d be on the home straight.
Famous last words. Cutting the steerer was fine, but running the brake hoses through the handlebar and frame was a bit of a mission. I think I had about three or four goes at that before I was done and that was the hardest part of the build. Although I’ve got it now, for the next one!
The problem was Shimano logic.
When you get the Shimano STI brake/shift levers for hydraulic brakes, the set includes the the lever, the caliper and the hose. The hose is already attached to the caliper and plugged and there is a plug in the back of the lever. In theory, you can take out the plugs, poke the hose in the back of the brake/shift lever and do it up.
Because of that, you are sent down the rabbit-hole of feeding the brake hose in through the frame from the caliper end, up through the frame and into the integrated handlebar, where it all goes pear shaped!
When feeding a brake hose through an integrated bar and stem, you have two options, from the stem end or from the shifter end. One way is significantly more painful and virtually impossibly. Guess which one?
Correct. The end that is already attached to part of the hardware by the factory.
To get a brake hose through an integrated bar and stem from the stem end is a nightmare, while feeding it through from the shifter end is a walk in the park. Admittedly the Park Tool internal routing kit makes it easier, but it doesn’t help going the other way.
So after I gave up and disconnected the hose from the caliper life was once again worth living. Thank you Shimano!
After that it was just fitting shifters, shortening hoses and bleeding brakes. And this is where the hose connected to the caliper makes even less sense. If you have the Shimano bleed kit; funnel, syringe, oil, it’s child’s play to bleed the brake. It’s not some crazy exotica with a recirculating pressurised pump.
Now with all of the internals out of the way, it was time to get the wheels on, get an idea of what the finished project would look like and dial in the drivetrain. A bit fiddly, but nothing new. The new Di2 is dead easy to set-up with the phone app. So much better than than the old 11 speed Bluetooth connector – I’ve replaced dozens of those!
So, well done there Shimano.
Actually, the phone app is really good. The charging port is farmer-proof. And overall, the 12 speed Di2 is really nice. It goes together well, it works and is reliable and it’s easy. And you can still fine tune it to a very high degree, which can’t be said of any of the other systems. My only criticism of the new 12 speed Di2 would be that the thinner cables and connectors seem a lot more fragile and I foresee issues with that.
All that being said, once I’d finished tuning the gears and stepped back to look at the bike, I was like, “Wow, it’s almost done!” Just the cosmetic stuff like bottle cages and bar tape, getting a saddle on it and going for a ride.
The Verdict
In the end, a really nice bike.
Nice to build.
Apart from bottom bracket shenanigans and a lot of a fluffing about with brake hoses, it came together pretty easily. I’ve done a lot of bikes with internal routing that have been more than a little frustrating, but with new wireless groupsets at least half the problem has been removed. And from a mechanics point of view, that’s the attraction of completely wireless systems.
Also for riders with older frames that want electronic shifting, but the frame doesn’t accommodate that.
Anyway, I finally got it all together and went for a ride and I have to say that I am impressed.
Super Smooth.
Handles really well, despite being a little smaller that I’d normally ride. Responsive, comfortable, stiff when you need it, fast and accelerates phenomenally when you put the power down, but what really struck me was a feeling of confidence in how it performed, how it cornered, how it accelerated. This is not my first high-end bike or C Series Colnago and having ridden quite few, you san feel the heritage of the C Series. It’s probably not as stiff as the C64. I think as a ride, it’s more like the C60 and I think that’s a good thing.
After the ride, I was starting think that maybe I also needed, it’s just a really nice ride.
I’m reckon this’ll light your fire, Luke!


Colnago History & Links
Ernesto Colnago opened his first shop in 1954 in Cambiago, Italy. He’d been a promising young rider, but a bad crash shortened that career and he went back to working in bike shops eventually opening his own. He became a highly skilled mechanic and was much sought after by professional teams to maintain and later build their bikes, eventually founding his own brand, Colnago.
Leave a Reply
You must be logged in to post a comment.