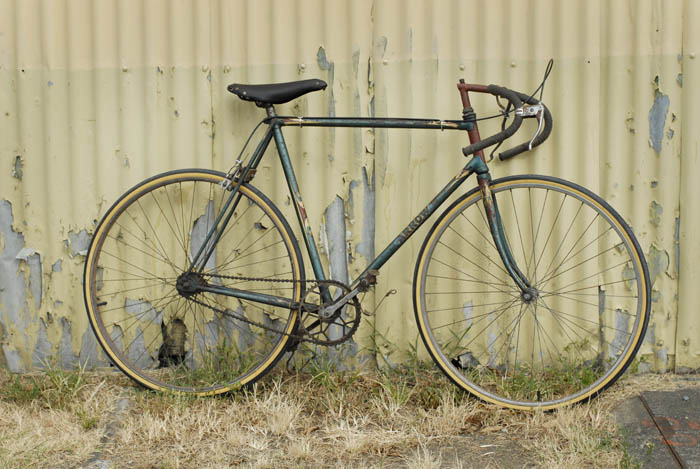
Ryan called me about restoring his grandad’s old racing bike. He really didn’t know much about it and only really knew that his grandfather had raced at a pretty high level in the late 1920s and 1930s. After he’d stopped racing, his race bike had gone into the shed where it had stayed until Ryan and his brother found it and decided to get it restored.
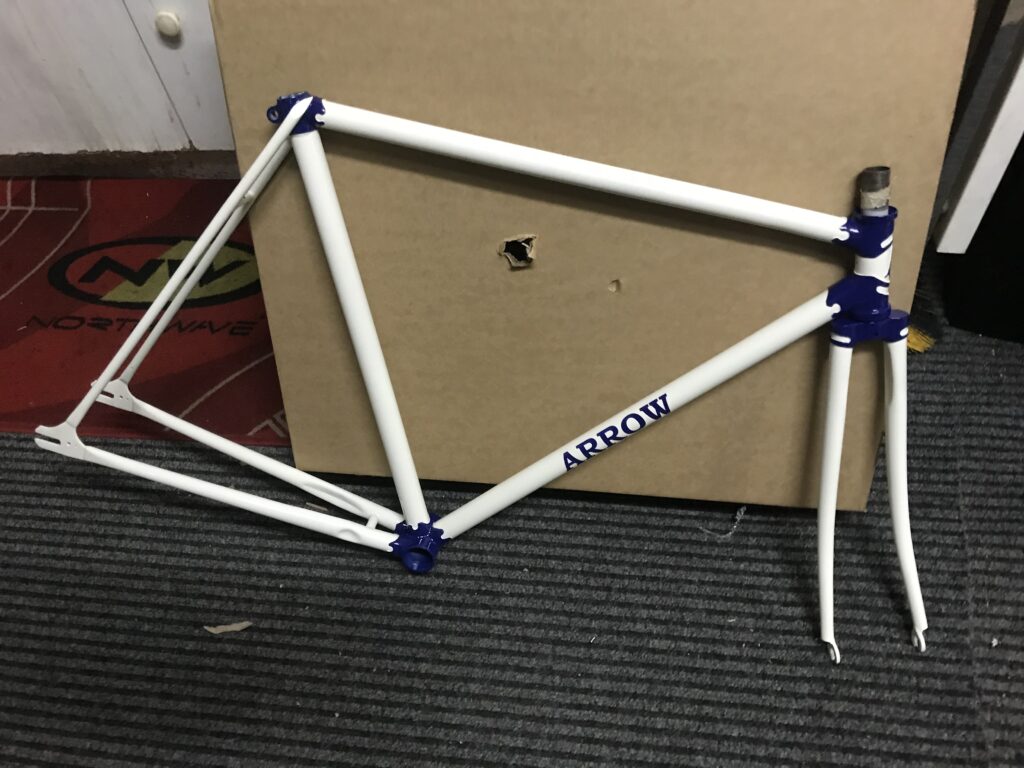
Ryan emailed me and asked if I was interested in doing a restoration? I asked him to send me some pictures …………….. I have to say it looked pretty bad, but I could see that once it had been a pretty decent bike, just by looking at some of the components on it, so I thought, why not.

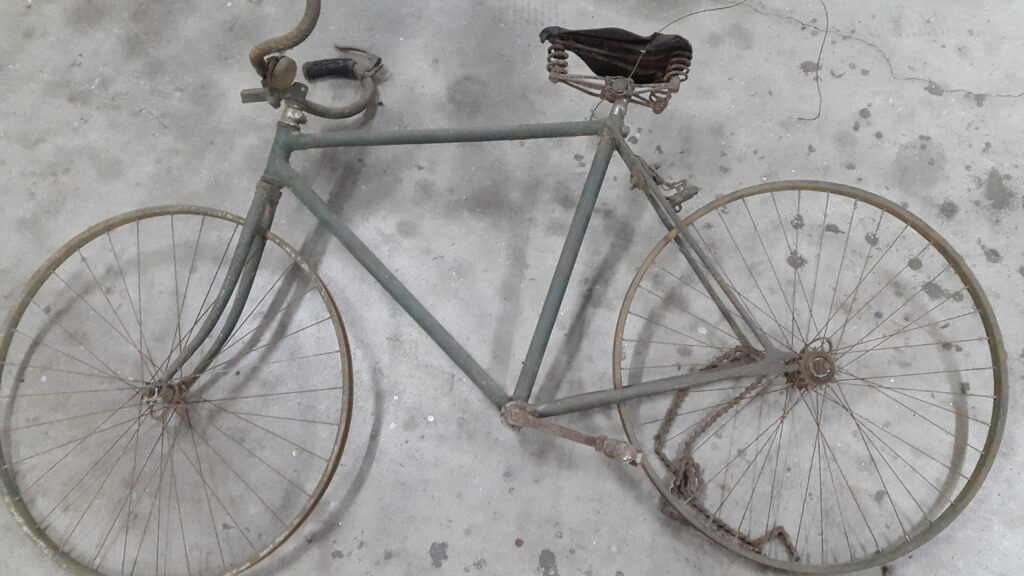


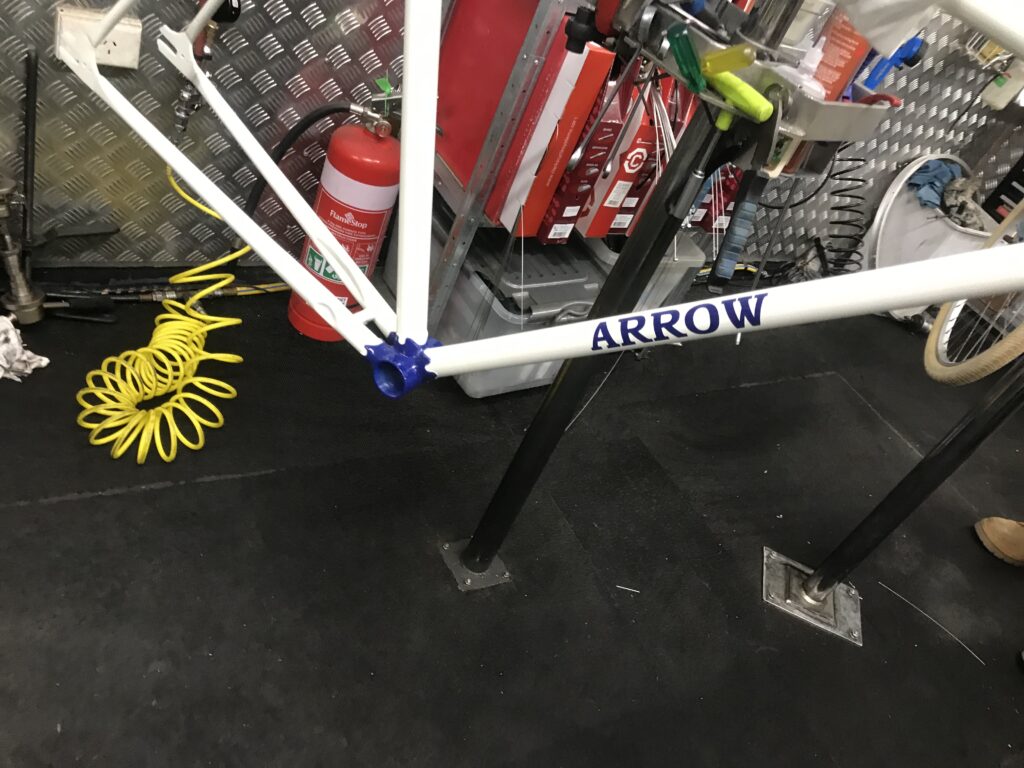
With a bit of an effort and a lot of care I managed to strip the frame completely whiteout breaking anything that wasn’t already toast and then sandblasted the frame and fork so we could have a good look at it and what condition it was in, which, as it turned out, wasn’t too bad for the age.
In the meantime I’d been trying to find out some more about the bike and the brand and to get some ideas of what the colour scheme might have been.
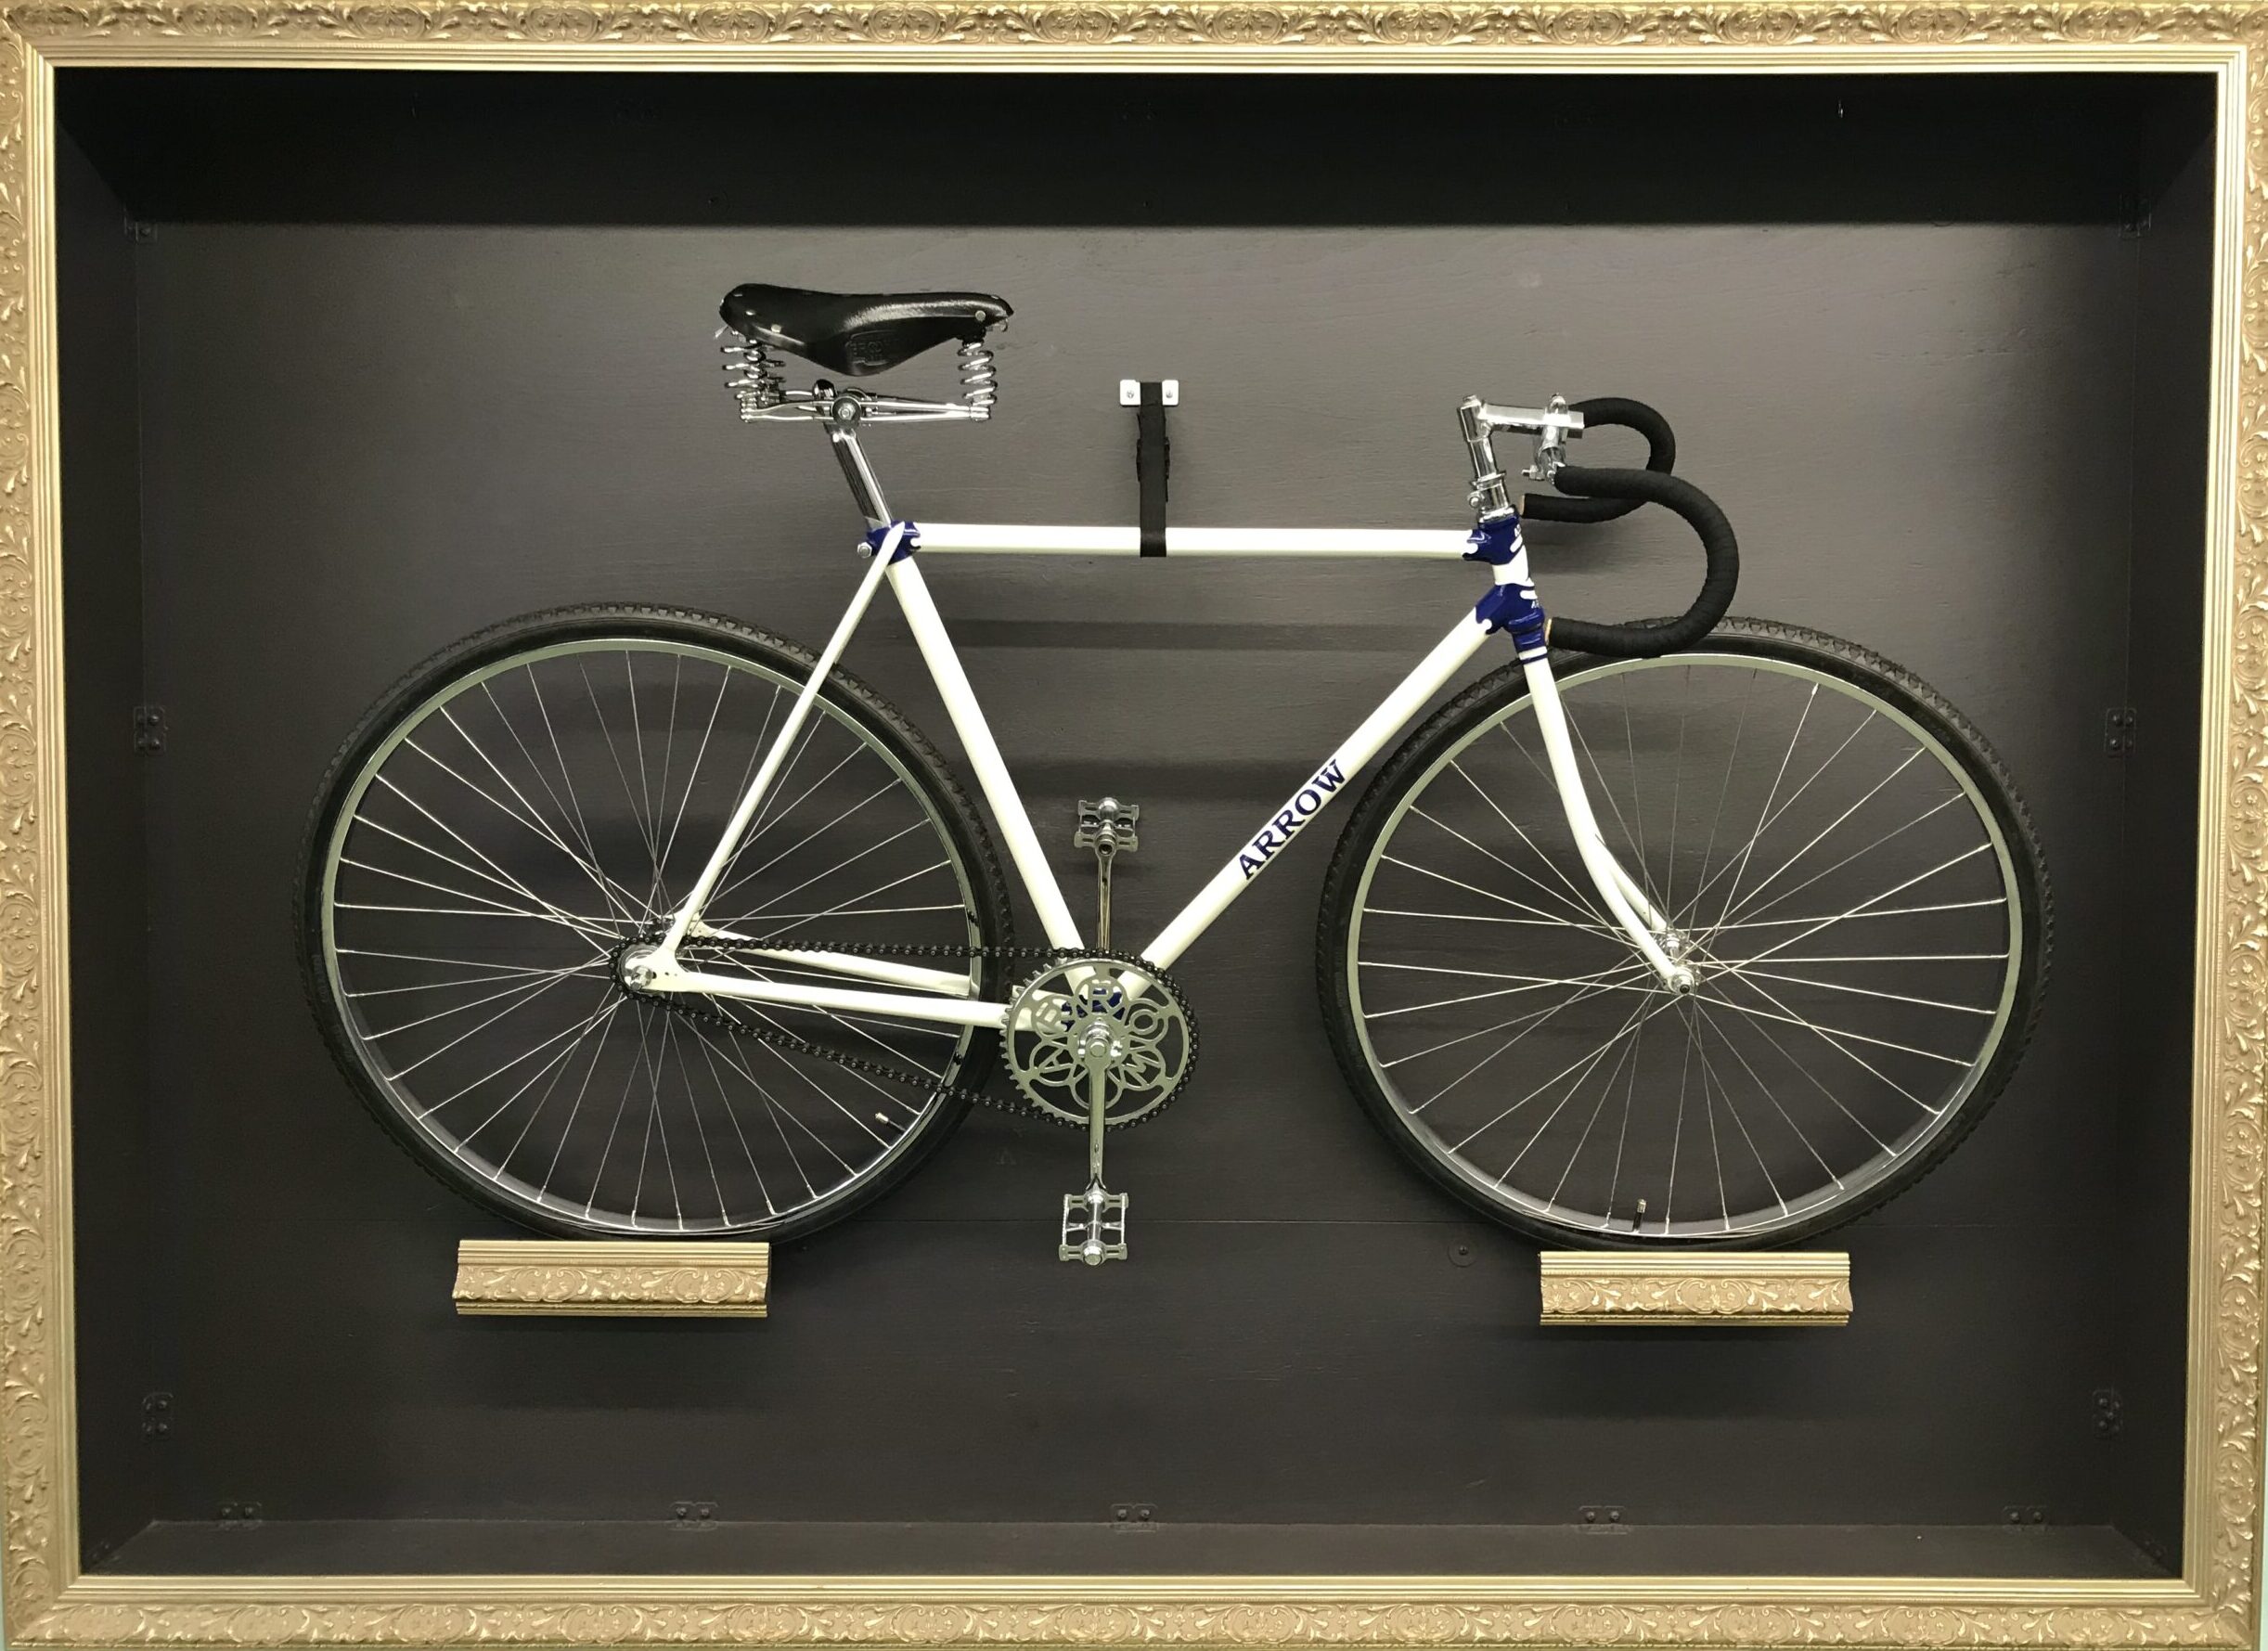
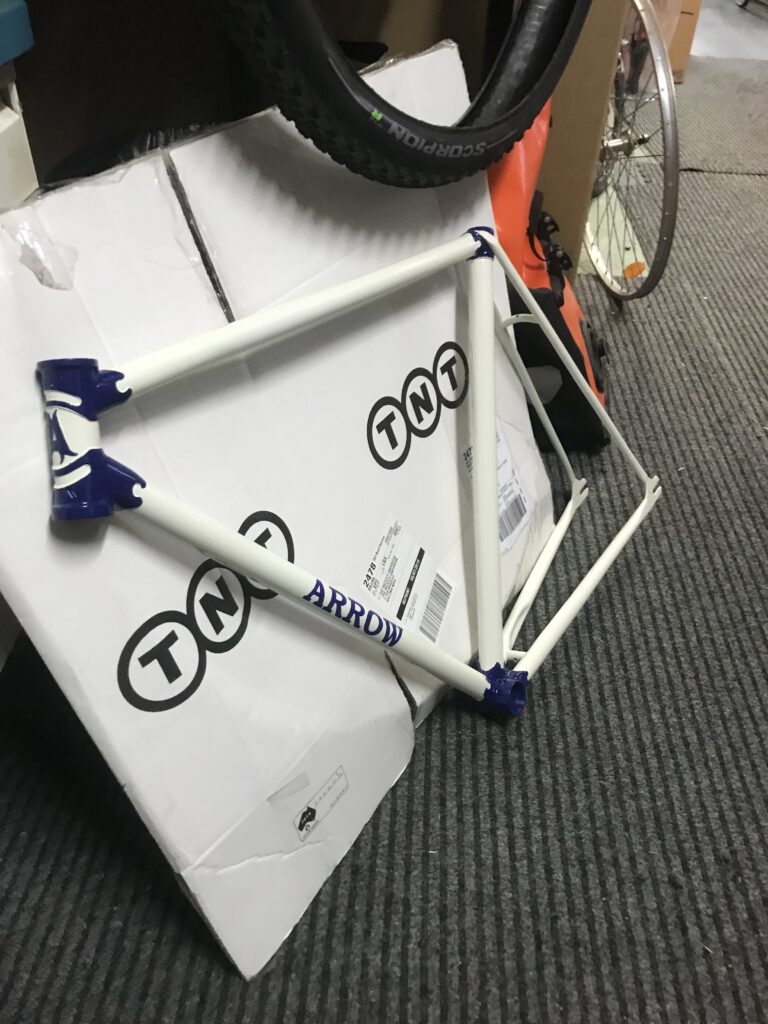
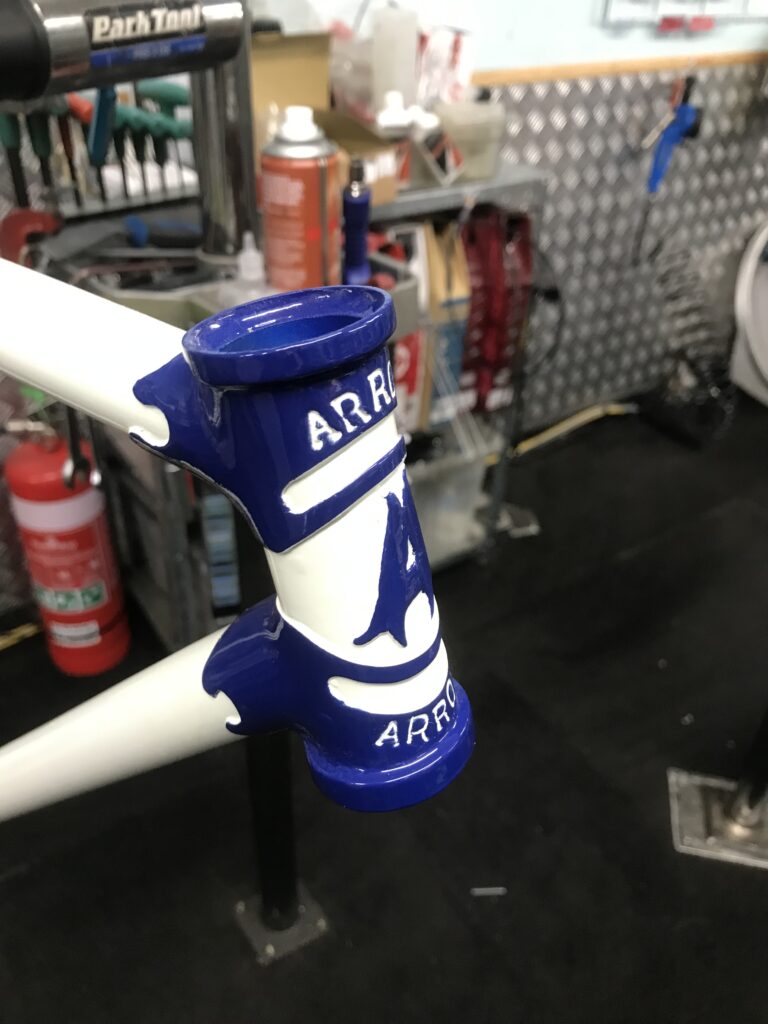
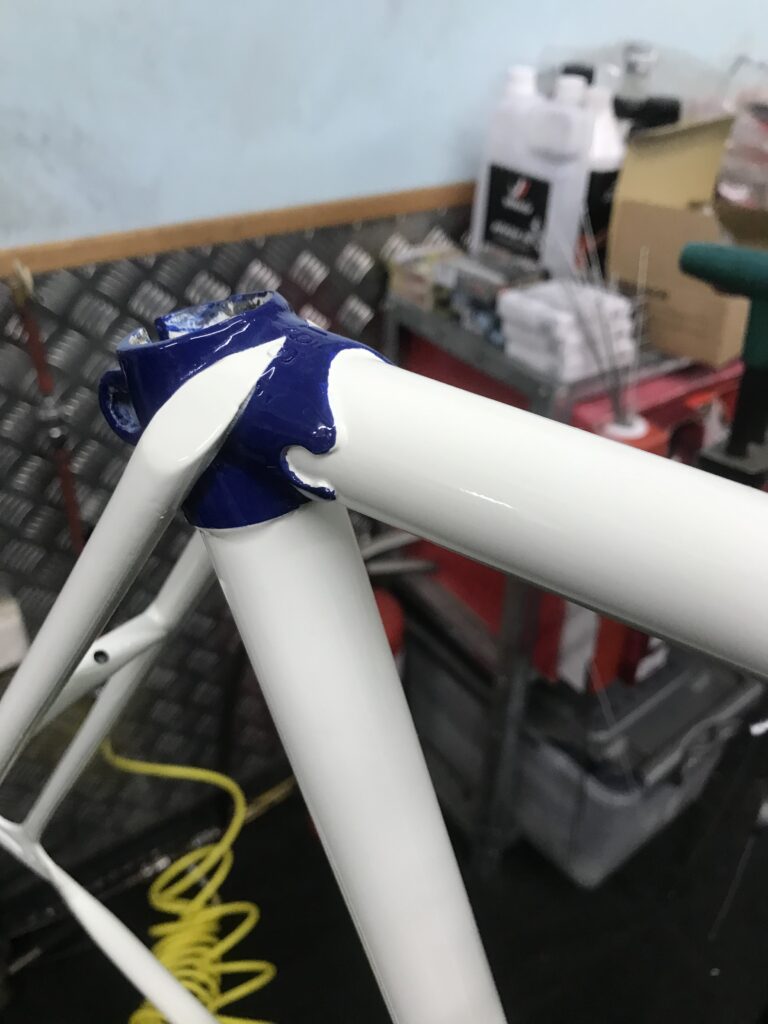
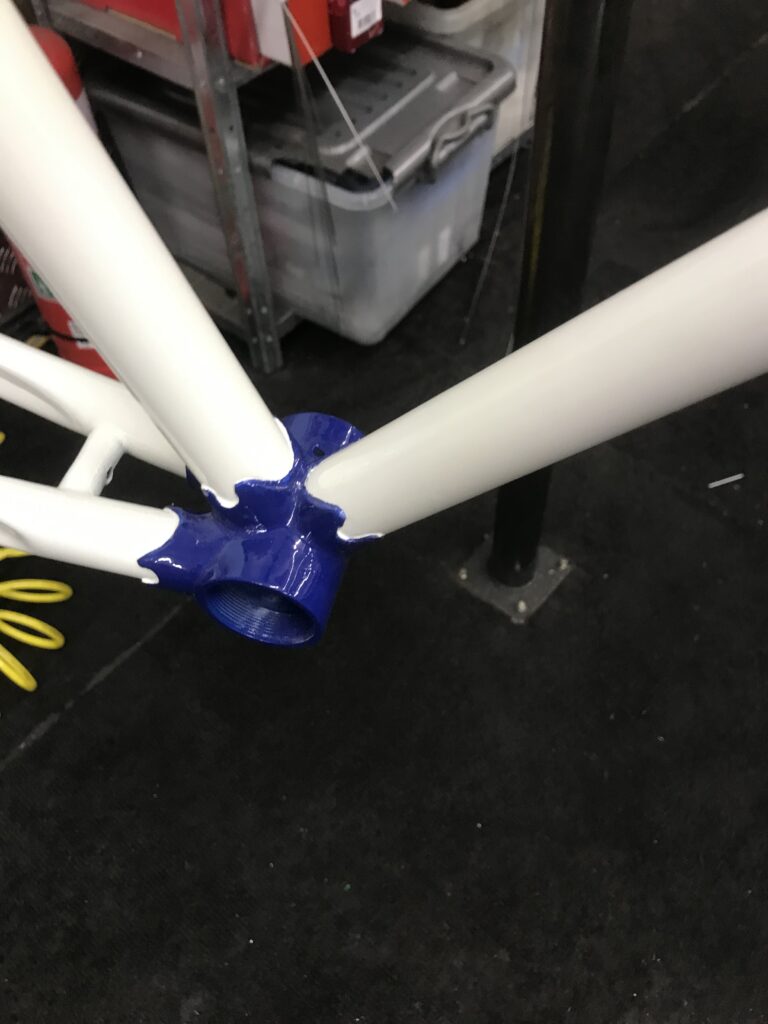
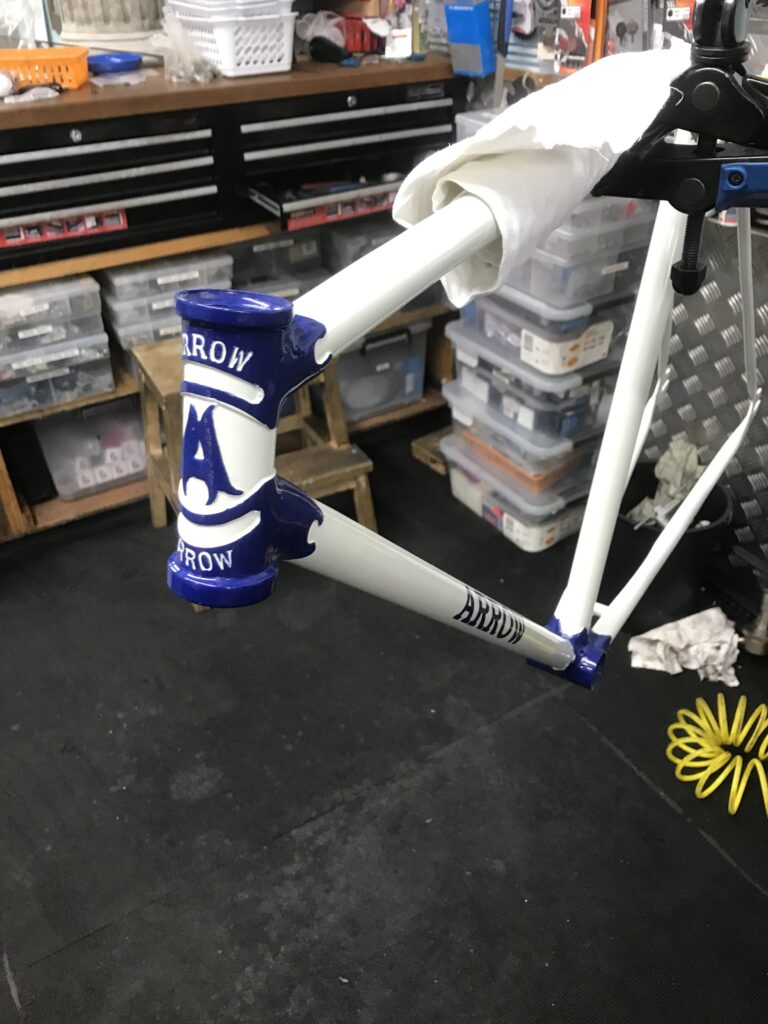
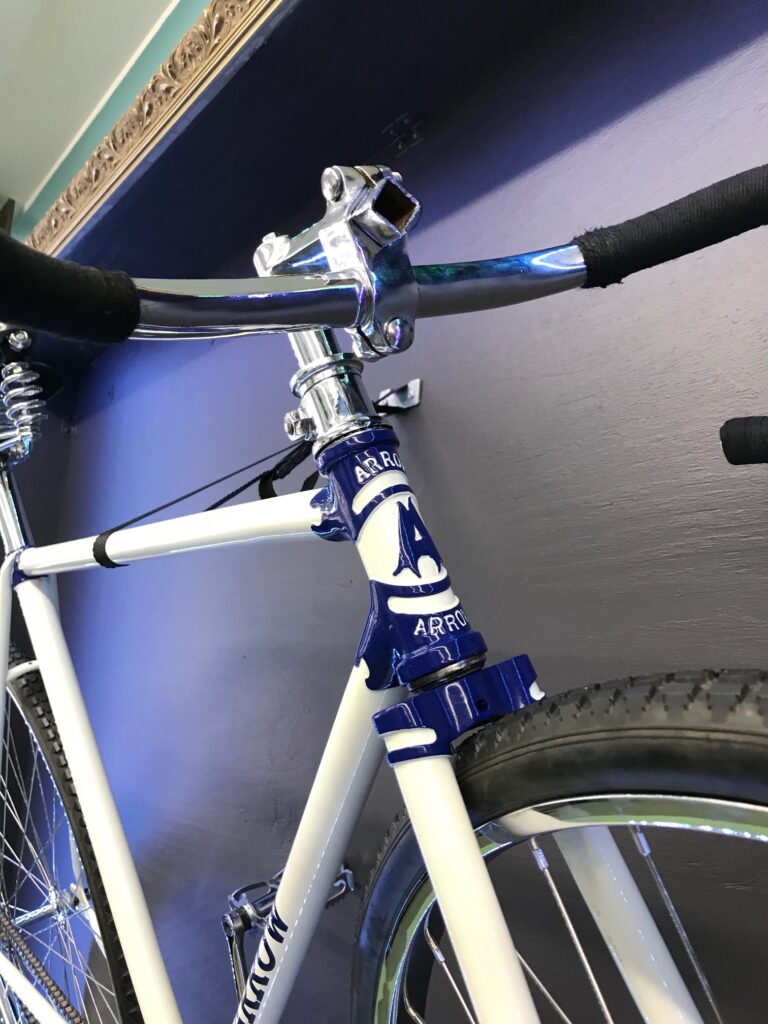
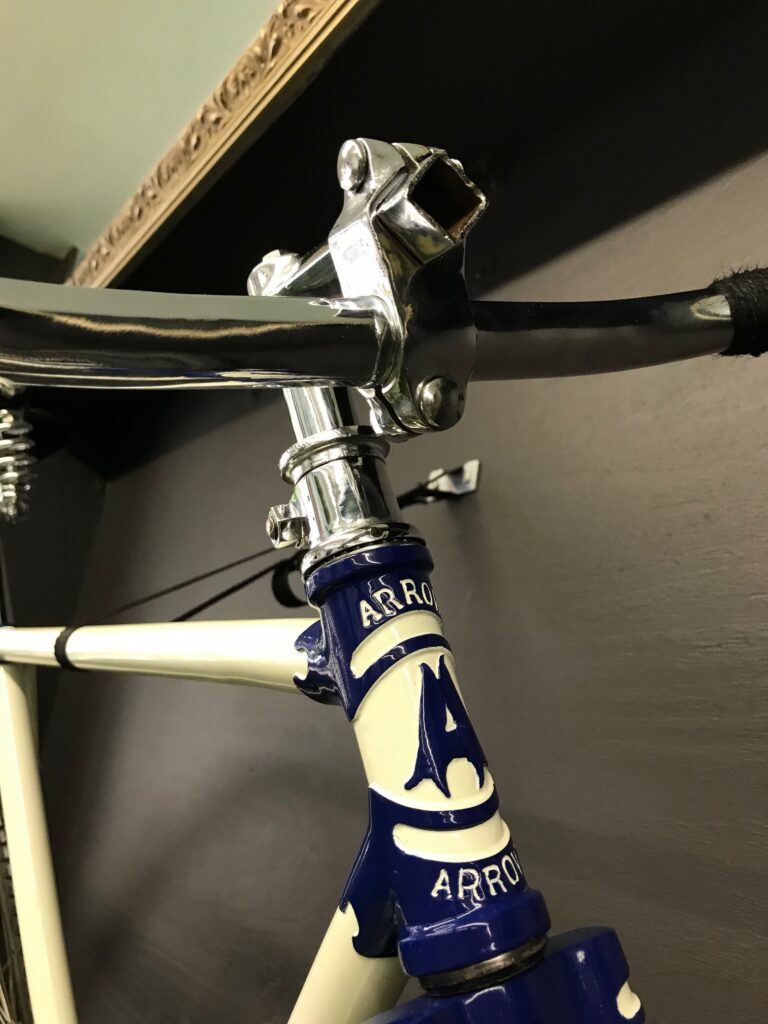
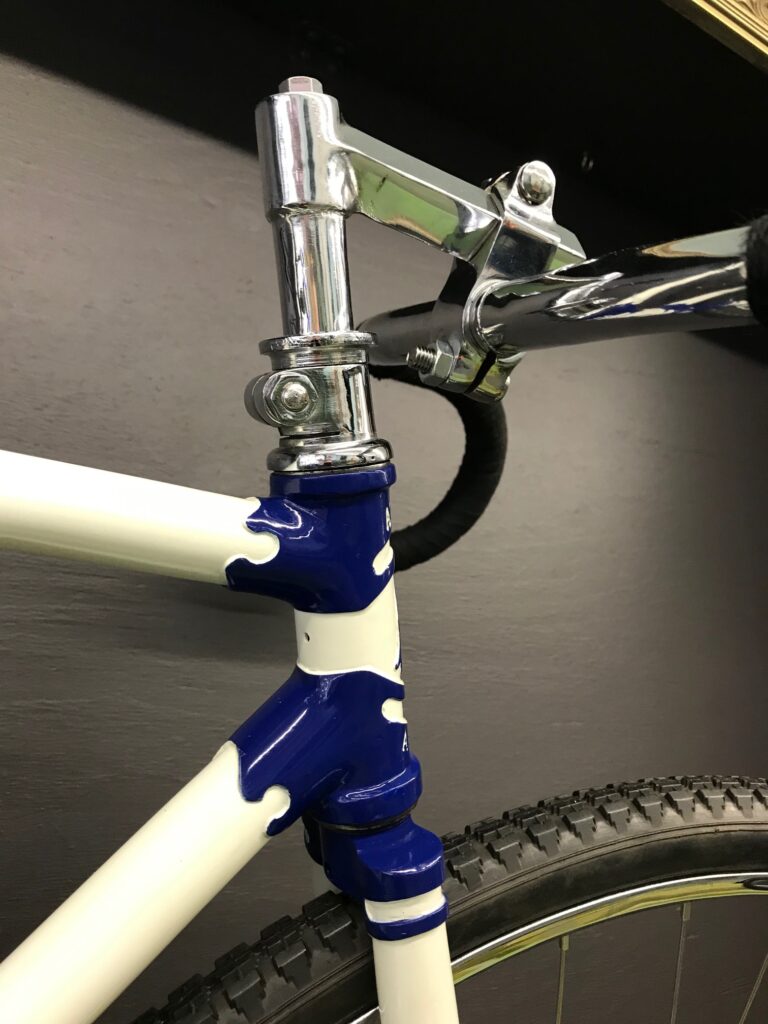
We got the frame back and filled and sanded all the dents, scrapes, scratches, rust pitting etc. and then sent it off to be expertly painted in cream and royal blue with a stenciled decal and hand-painted lugs with our friends at Aussie Dent King.
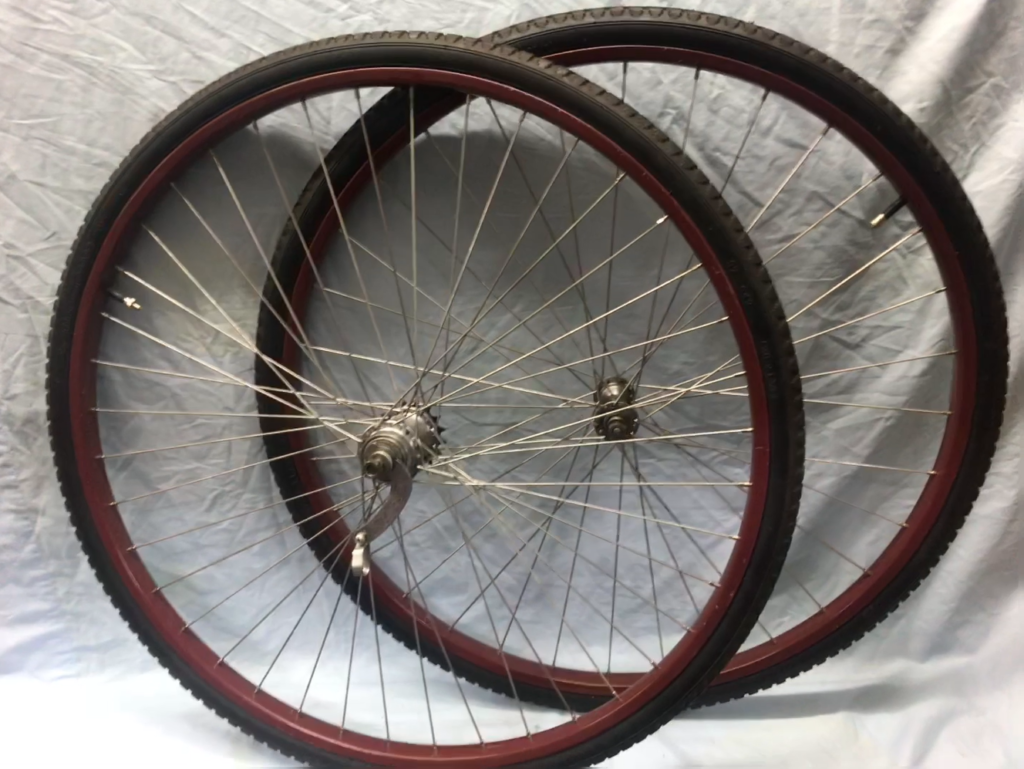
While that was going on, I started looking for wheels. The original rims were pretty rusty, and one area of both wheels had obviously been on the ground for years while it was sitting outside and they had just about rusted through.
After months of searching for new rims or even secondhand rimes or complete wheels worldwide, there was nothing to be had anywhere. Time for some hard decisions.
I had a pair 28″ rims on another vintage bike, so I decided to repurpose those. I stripped the hubs and spokes out of those and had them blasted and then chromed. At the same time we stripped and cleaned the original hubs (36 hole front and 40 hole rear) and had those chromed as well. Then we rebuilt the hubs and and laced the wheels. Also a bit of a mission as none of the local suppliers had stainless steel spokes long enough. While not usually the cheapest option, when all else fails, ebay USA!
Once we had the wheels done, tyres and tubes were available locally and we had a complete wheelset. We also had a painted frame!
Then a lot of chrome work. Apart from the hubs we had to clean up and redo the chrome on the seatpost, headstem, handlebar, bottom bracket and crankset – but wow, what a crankset!


Then it was time to start putting back together.
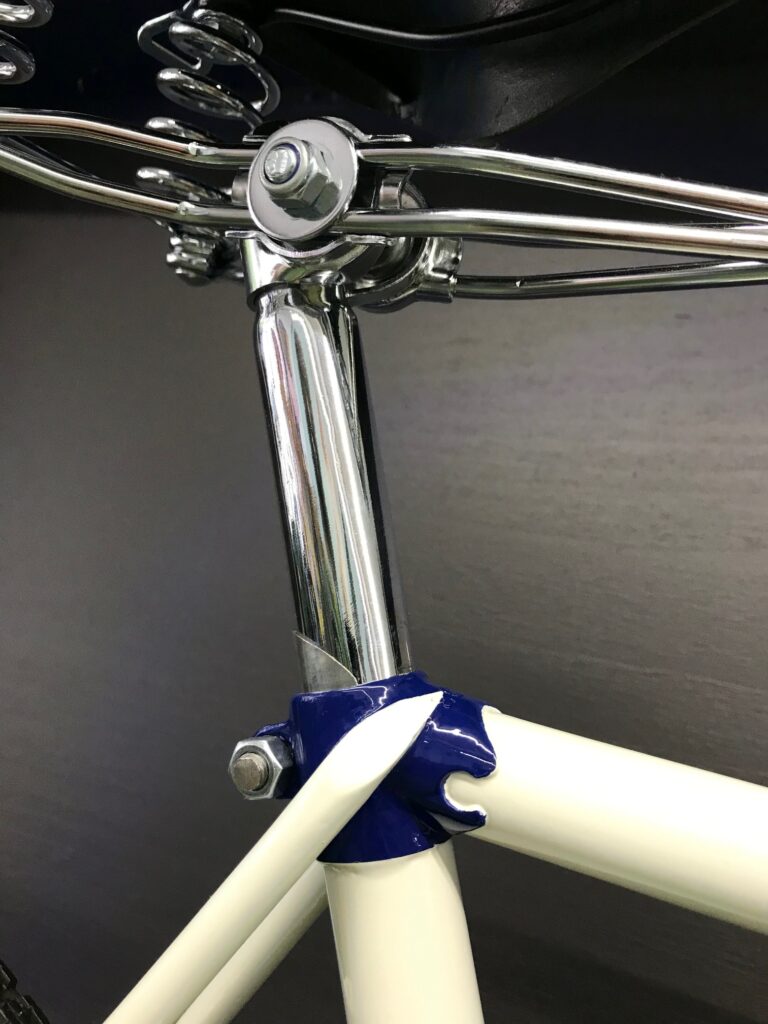
I usually start with the seatpost, then I have something to grab the bike by that won’t worry paintwork or decals. The original seatpost was too small, which was pretty common back in the day. Unlike today where seatpost are available in any diameter from 22 to 35mm in 0.1mm increments, historically fewer sizes were available despite a wide range in the internal diameters of the available tubing.
The solution was to use a shim and you could buy them. Basically a disc of sheet metal about 30mm in diameter. I gather there were different thicknesses, but the only ones I’ve ever seen in the flesh have come out of old frames. From talking to older riders, it seems that a bot of a kerosene tin was the the most common form!
Anyway, you take the disc, roll it around the seatpost to shape it and insert into the seat tube with the seatpost. The tip is to insert it at the front so that when you do the seatpost bolt up, it doesn’t crush the shim. Also, fold the top edge over a so the shim doesn’t disappear inside the frame when you move the seat up and or down.
The original shim from this bike had been inserted at the back of the tube and a decent crease along it, I tried to panel beat it, but it was too far gone, so in the absence of a kerosene tin, a new custom shim was made from a tin of corn kernels. Perfect.
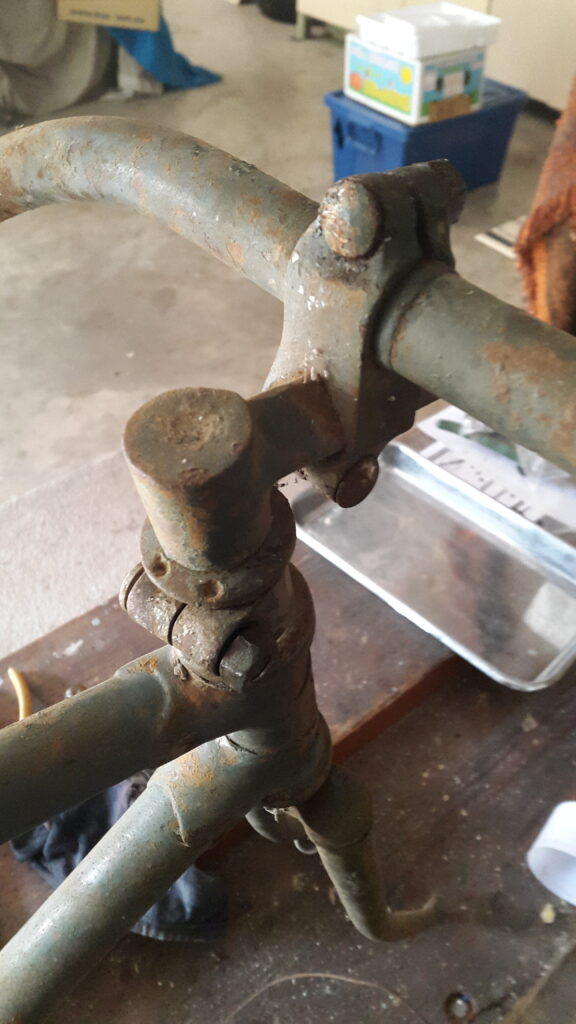
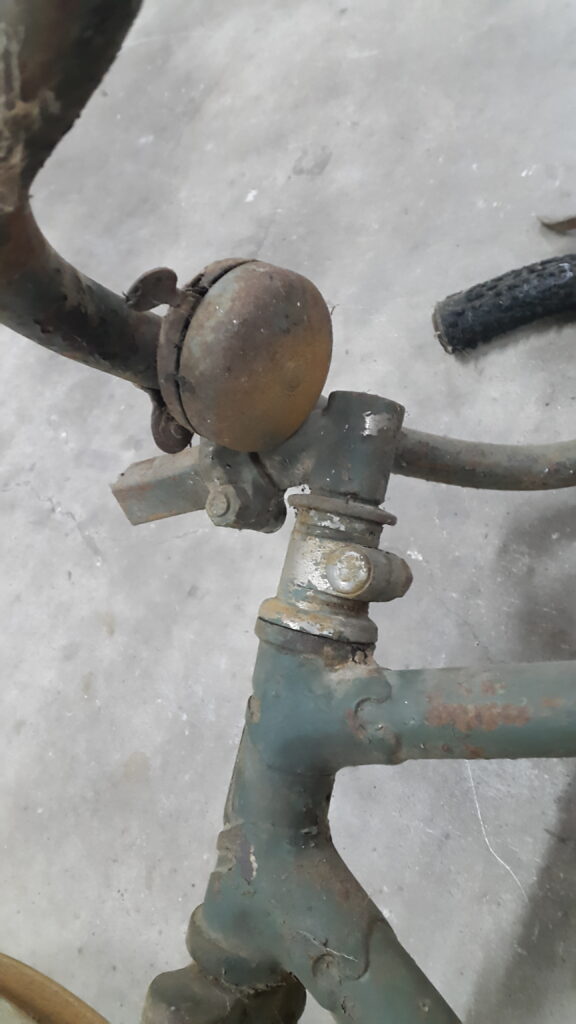
Then with quite a bit of back and forth and some cursing, I go the headset sorted and the fork in place, but the crown nut for the top of the steerer was just too badly damaged and wouldn’t stay done up. After a long search I actually found one in Grafton. Another trip to the metal plater and we had a frame with a fork, got the stem assembled and in place and fitted the handlebar and it was already starting to look like a bike. At this point we put in the wheels and had a pretty good idea of what the finished bike would look like, which after a lot of work and endless searching for bits, was quite salifying.
But it wasn’t over …
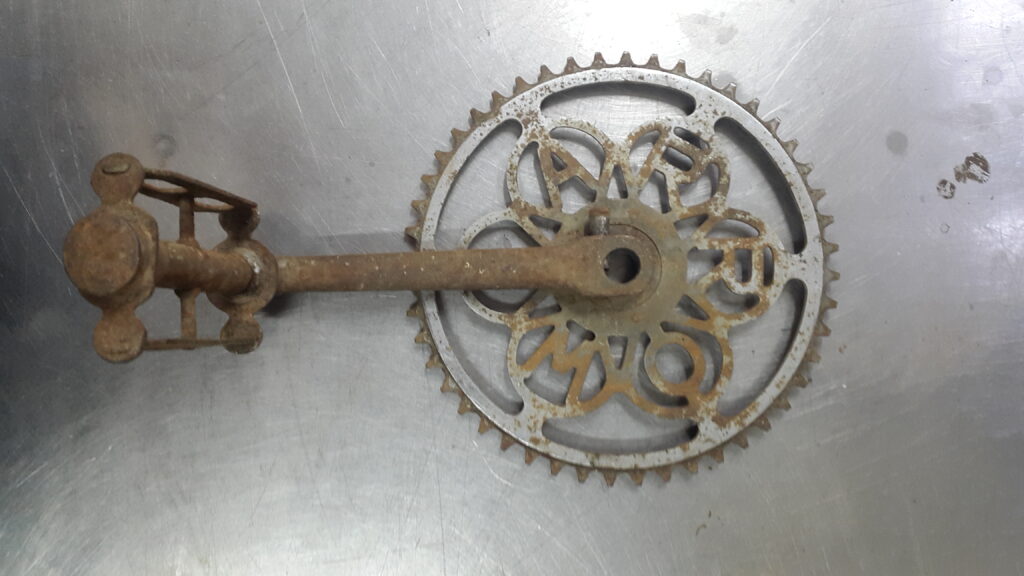
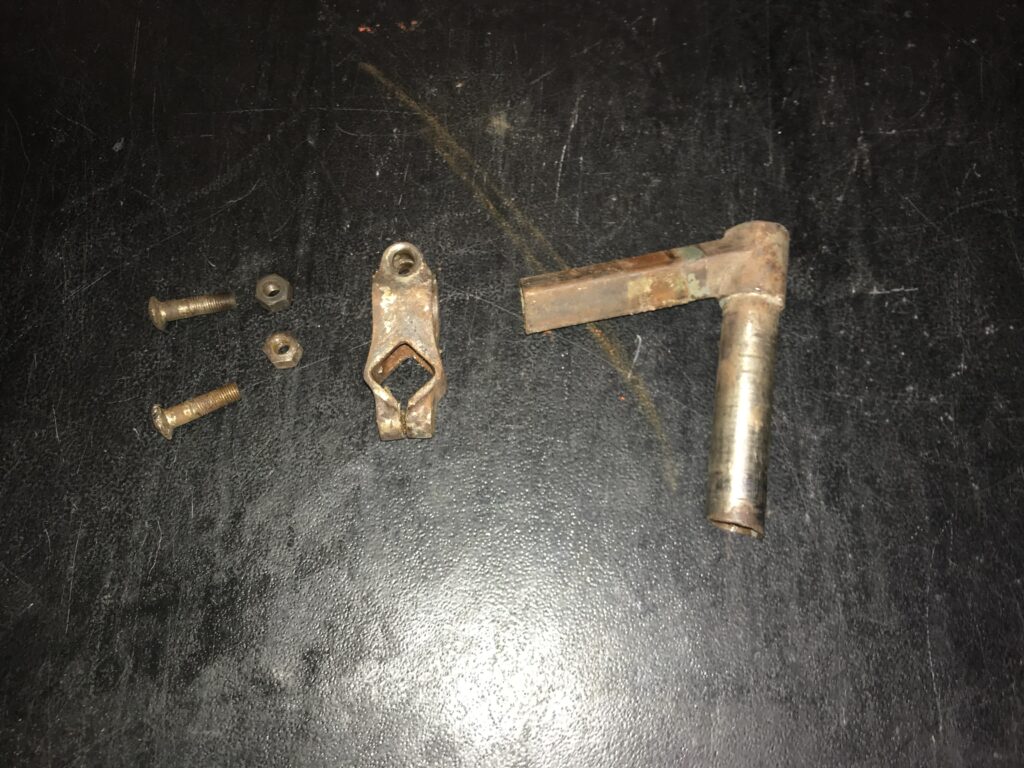
Next was getting the bottom bracket together and the crankset one. Well when the cottered pedal spindle and the cranks came back from the metal plater, the chrome was too thick and the cranks wouldn’t fit on the spindle! That was very frustrating. So I took the spindle back to be redone and I don’t want to think about what happened, but when it came back it was too thin! I was pretty annoyed about that (understatement – I was ropeable!).
So back t o the internet to find a cottered pedal spindle. Who knew there was such a variety? In short, I gathered a pretty decent collection of cottered axles before I found one the right dimensions. Another trip to the metal plater with tongue firmly clenched between teeth and finally we has the key part of the drive train in place. Given that the ARROW chainring was such a distinctive feature of the bike and I have never seen another Arrow with that crankset, I was pretty happy to have it back on the bike.
Then with the wheels in, I just needed a chain. As it turns out, one of my customers had brought in a vintage chain, new, still in it’s original tin complete with grease, because they’d heard that I restored bikes and didn’t want to just throw the chain away. Thanks you that man!
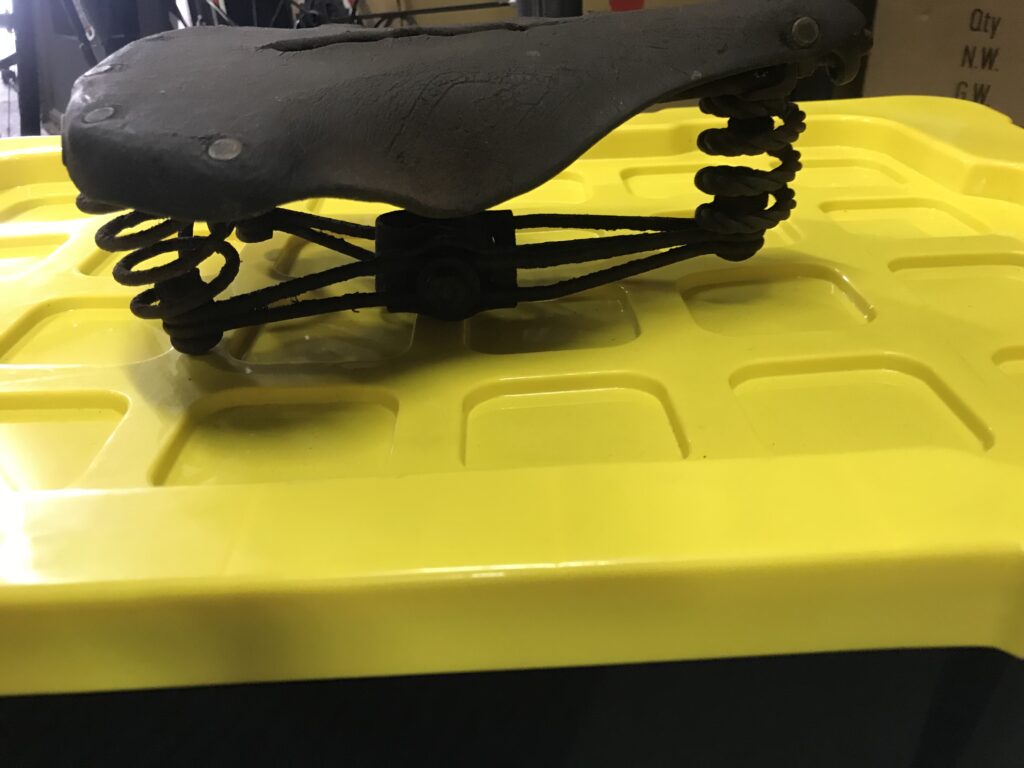
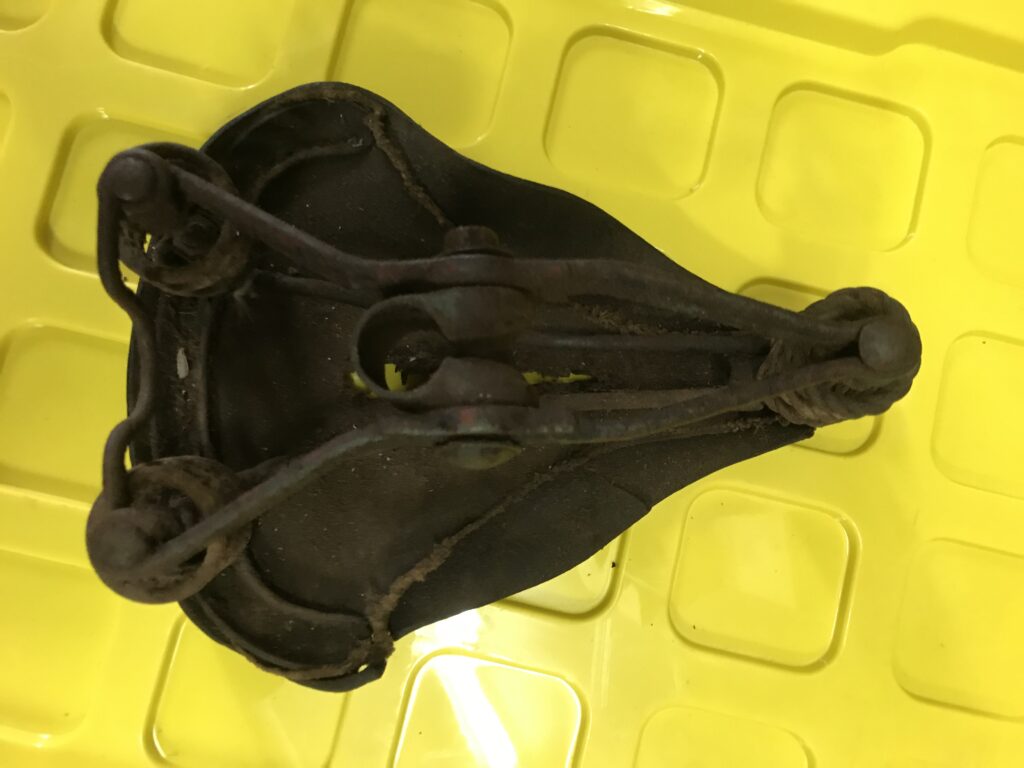
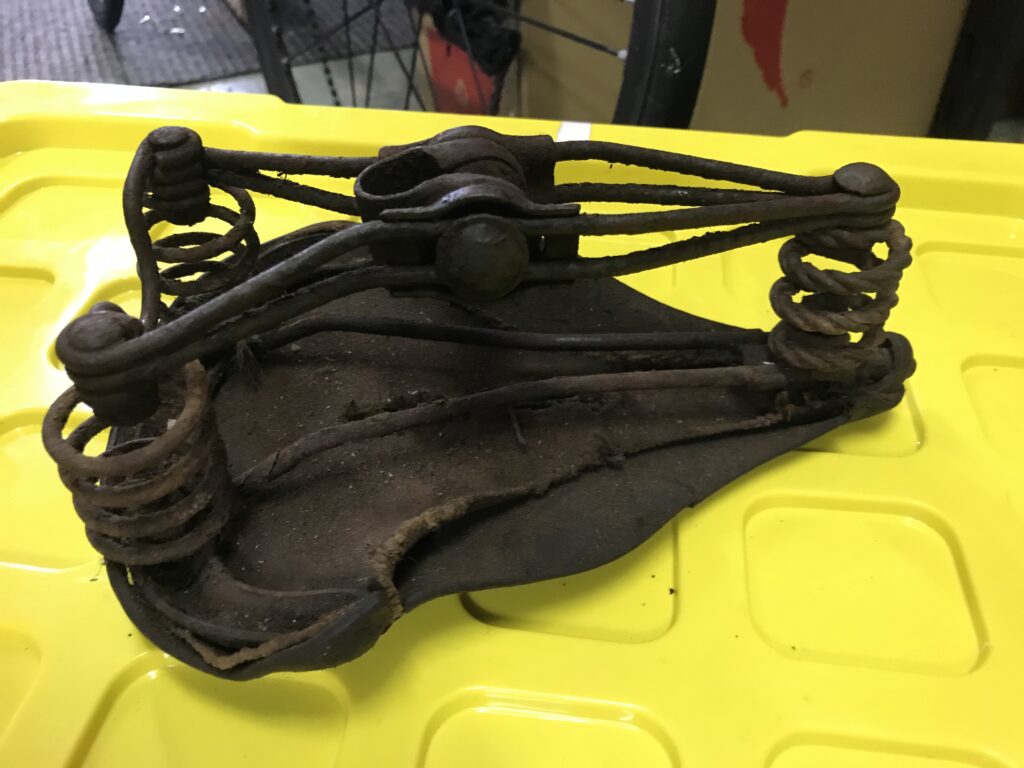
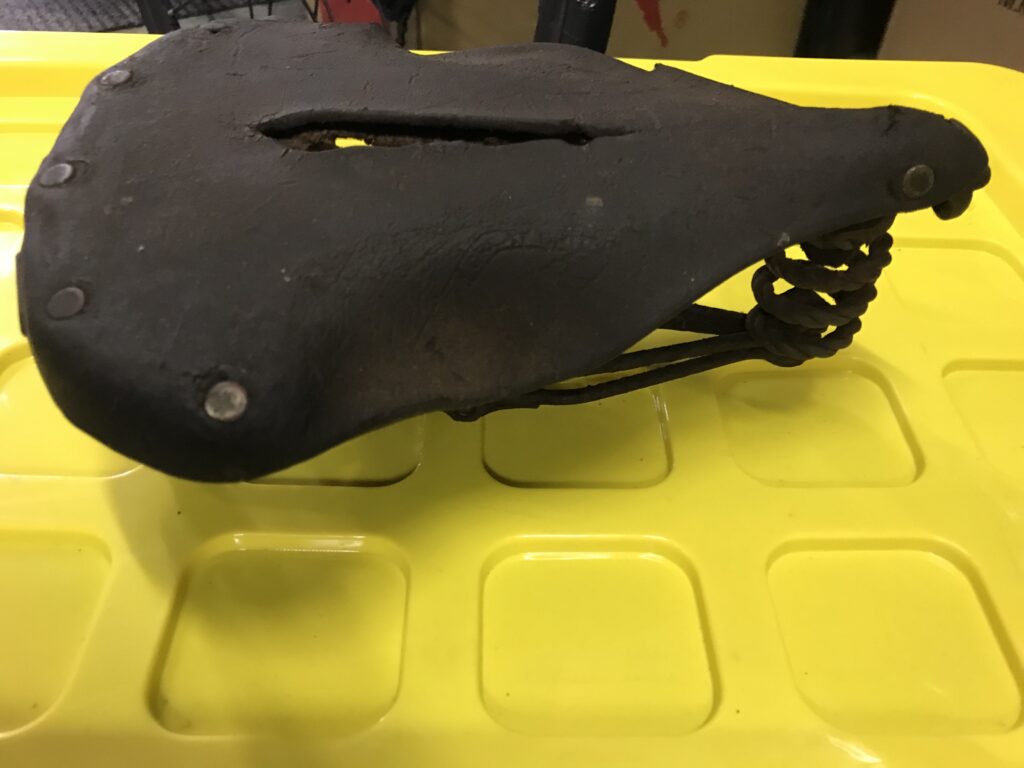
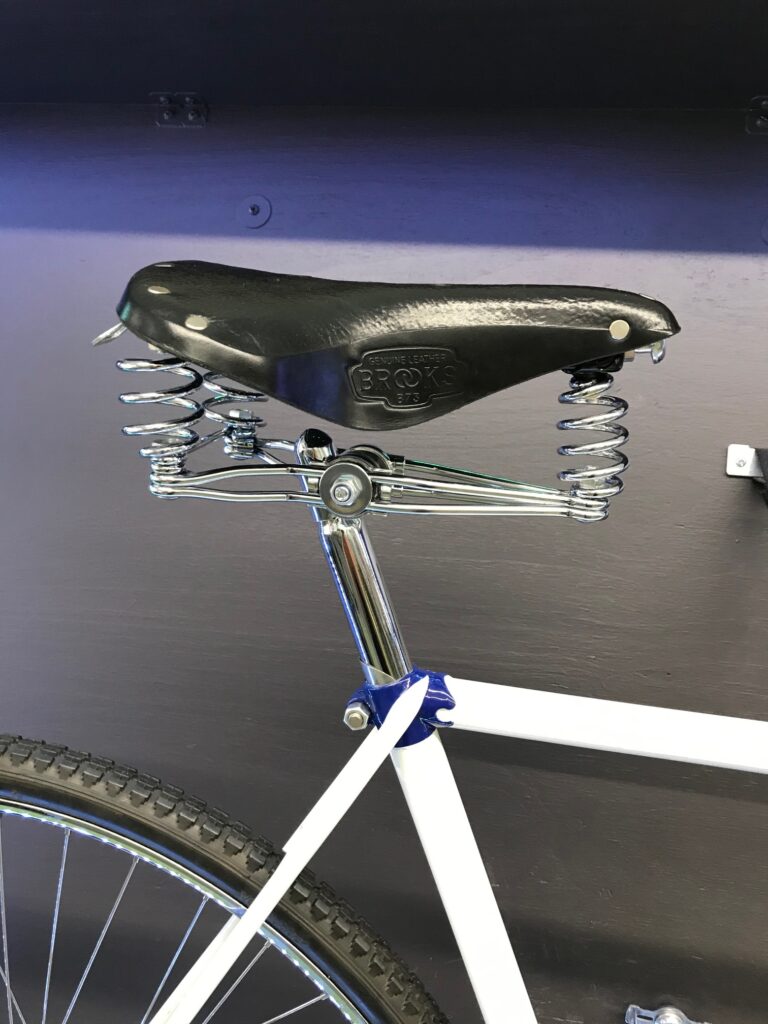
So, now it was just the finishing touches. As you can see from the before images, the saddle was in a pretty poor state. I looked around to see if anyone was able to restore it, but had no takers. Well, one who said they were prepared to give it a go, but couldn’t guarantee the outcome. Thank you, but I think I’ll pass.
As you can see in the picture, the saddle was quite well made with the twisted steel coils for the springs. The brand on the back of the saddle is “Challenger’” which I haven’t been able to find out anything about. So, I had a chat with Ryan and he thought that the best option would be a new Brooks saddle that was similar and that he would preserve the original saddle as part of the display he was planning to make for the bike and a few other bits of memorabilia that he had. So, Brooks it is.
Then to finish the handlebars, I wrapped them with Newbaums cloth bartape, and a pair of cork bar ends painted black and black hemp twine binding. I also shellaced the binding to keep it from ever coming undone. Oh yeah, that looked the business!
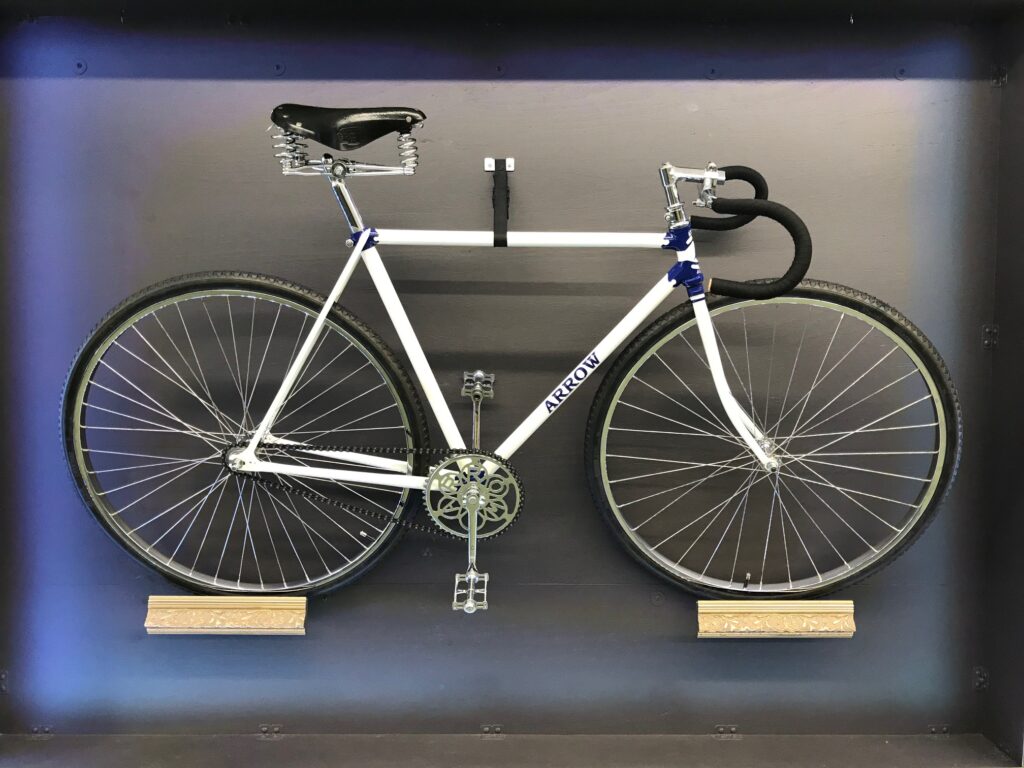
So a year and a half and a lot of heartache later, it was finally finished.


Arrow History & Links
There doesn’t seem to be a lot of information available on Arrow bikes.
But, from what I’ve found, it looks like they made fairly high end road bikes in Perth, Western Australia.
The only decent resource that I found is another Blog, Velo Officianado, that has an article on Brisbane Cyclist, Kevin Fallon, who rode an Arrow bicycle in the Empire Games in the 1930s.
I found another site when we were searching for images that would have given us an indication of the colour scheme. Most of them seemed to have much more extensive artwork than was apparent from what remained on Ryan’s bike before we started. The site is from Classic Cycles on Bainbridge Island, near Seattle in the Washington, USA. Apparently they have a 1920s Arrow in their museum, which I think I need to visit!
Leave a Reply
You must be logged in to post a comment.